This little smart home gadget can save you up to 15% on your heating and cooling costs.
So you’ve decided to get a smart thermostat? Awesome! But how on earth do you install it?
If you’re good with wiring, installing a smart thermostat can actually be a pretty simple DIY project. (And even if you’re not good with wiring, smart thermostat compatibility checkers are available to help you out.)
If you haven’t purchased your smart thermostat yet, tap here to see what rebates might be available to you. Or learn how you could possibly get home energy upgrades with an energy-savings guarantee with Sealed. See if you qualify.
Here’s what you’ll cover:
- Is installing a smart thermostat easy?
- Steps for smart thermostat installation
- How much does it cost to install a smart thermostat?
- Get powerful home energy upgrades with flexible payment options
But before we dive in, let’s start with the reason why you’re here:
Can I install a smart thermostat myself?
Yes, most smart thermostat installations are a quick afternoon project for a confident DIY-er. If you can follow an instruction manual and are handy with a screwdriver, wire, and wire nuts, it’s likely you can install a thermostat yourself.
But some folks don’t like to mess around with wires or electricity (and we don’t blame you). So if you have any doubts after reviewing the manufacturer’s instructions in the installation guide, call in an electrician or HVAC professional. Live a life of no regrets!
Can I replace my old thermostat with a smart thermostat?
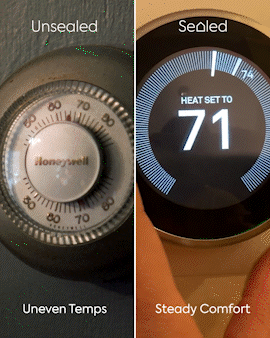
If you’re ready to say goodbye to your old thermostat of yesteryear, upgrading to a programmable thermostat with smart Wi-Fi capabilities can be a big energy-saving improvement.
There’s a thermostat for almost any HVAC use case, but (IMPORTANT!) you need to check for compatibility ahead of your purchase and installation.
(Also important: You need a Wi-Fi network for smart thermostats to work. So if you still love the sound of dial up, well, I guess you’ll have to pass.)
How to test for smart thermostat compatibility
- Turn off the power to your HVAC system and thermostat via your breaker panel. Remove your existing thermostat from the drywall anchors and trim plate and look inside for the wires.
- Test with one of these thermostat compatibility tools (you can even send along a picture of the wires!):
It’s important to know: If you open up your current thermostat and notice high voltage wire labels, it’s unlikely your HVAC system is compatible. You’re going to need expert help, so it’s time to call in a professional.
Do I need a C wire to install a smart thermostat?
You might need what’s called a c wire to install your new smart thermostat. If you have a newly constructed home, it’s likely you don’t have to worry about this part. But if you have an older home (or one that was built just a few years ago), you may need to install one when converting.
Some models, like the Google Nest, can charge its own battery without a c wire when your home heating or cooling system runs.
The best way to know if you need a c wire for your house? Check the manufacturer’s instructions, a compatibility checker, or call an HVAC pro.
Does my HVAC system need to be replaced to install a smart thermostat?
Smart thermostats are highly versatile and can work with the majority of existing HVAC units, but you’ll want to check first before you convert. If your HVAC system is 10 years or older, you might have trouble with the two “talking” to one another.
Plus, if your heating or cooling system is getting up in age, it may be time to prep for an HVAC replacement, depending on how well your unit has been maintained and how well your house is insulated.
HVAC technology has come a long way in recent years, and you may not be heating your home in the most efficient way right now.
You know what pairs really well with an energy-saving smart thermostat? A super-efficient heat pump HVAC system.
Learn all about heat pumps here.
81% of those who have smart home products are more likely to buy a home if smart technology, like smart thermostats, are already installed.
Caldwell Banker and CNET Smart HomeSurvey
Steps for smart thermostat installation
Before you jump ahead with your installation, take these preliminary steps:
- Step 1: Turn off your entire HVAC system via the breaker panel.
- Step 2: Read the manufacturer’s instructions and installation guide in full for model-specific step-by-step instructions.
- Step 3: Gather required supplies, including a screwdriver and any adapters or wire nuts needed.
- Step 4: Install the app that corresponds with your new smart thermostat. (Usually there’s step-by-step help within the app, too!)
We’ll go through each type of installation here, but note: The first step is the same… Turn off your HVAC system via the circuit breaker.
This is key. Before you remove your old thermostat—or get started with any of the other steps of the installation process—make sure you cut off the power to your home heating and cooling system to avoid any electrical problems.
Smart thermostats are installed three main ways. Use the links below to skip ahead to the kind you have:
- Ductless HVAC systems controlled by a remote
- HVAC systems controlled by a low-voltage thermostat
- Electric HVAC systems controlled by line voltage thermostats
How to install smart thermostats for remote-controlled ductless HVAC systems
Do you have a ductless HVAC system (sometimes called a mini split or mini-split AC) that doesn’t have a centrally wired thermostat? Or perhaps a window AC unit?
This is the easiest of the installations, so you’re in luck!. Let’s assume your HVAC is already turned off, so now, follow these three easy steps:
- Plug it in. Plug your new smart thermostat into an outlet close enough to your mini split or AC unit so that nothing stands in the way.
- Connect to Wi-Fi. Use your smart thermostat’s app instructions to connect your AC controller to Wi-Fi .
- Time to pair. Pair your thermostat with your mini splits using your Wi-Fi network. Match your commands from your remote to the smart thermostat’s database. This will give you full control of your HVAC system through your app.
Sealed’s installer was very knowledgeable and their price was competitive… I’m glad that the work is now done!
Blaise B., Sealed customer
Installing a smart thermostat for HVAC systems controlled by a low-voltage thermostat
- Turn Off Your HVAC system’s full functionality. Remember, you must do this first. It’s a safety rule! You can even take it a step further and turn off the breaker to your thermostat if needed.
- Remove the faceplate of your old thermostat. (Of course, if you use a thermostat cover, remove that first.) Then remove the faceplate and, take a photo of the wiring. You’ll need this for later. Some smart Wi-Fi thermostats provide stickers or wire labels to help with mark the wires, but not all do.
- Heads up: You may need a screwdriver for this part (and something to label with!). First, remove your existing backplate. Then disconnect your old thermostat’s wires and label them as needed.
- Install your smart thermostat’s backplate. Secure its backplate to the wall with the screws provided in the packaging.
- Connect the wiring. Now here’s the trickiest part of the process. Luckily, most low-voltage thermostat wiring is colored and labeled. To put each wire in, you may have to push down on a matching tab or tighten a screw.
- Finally, it’s time to put on the new faceplate. Line up the connectors and slide the faceplate to secure it. Note: It should click into place.
- Connect your thermostat! We’ve made it to the most fulfilling part of your installation. Connect your thermostat to your Wi-Fi, then pair it to the mobile app on your phone. Once your app is up and running, you should be able to control your thermostat as planned with its full functionality!
Pro tip: Most smart products need a 2.4Ghz Wi-Fi connection to work properly. If this is an issue for you, reach out to your internet provider for help.
How to install a smart thermostat for an electric HVAC system controlled by line voltage thermostats
- Assuming your HVAC is turned off, it’s time to remove your old faceplate. Remember, turning off the whole heating and air conditioning system is the number one step, no matter what!
- Remove your old backplate. Here, all you need to do is unscrew and ease the old backplate off. Now snap a photo of your red, black, and/or white wiring.
- We’re at the craftiest part of your install—the wiring. And line voltage thermostats require a bit more detail work. You’ll need to take note of the voltage of your existing system and how many heaters your thermostat controls. Of course, you can reference your specific installation manufacturer’s guidelines here, as well as the photos you took earlier. If you have trouble, reach out to an HVAC professional for help.
- Once you’ve completed the wiring part of your installation, you can put on your new backplate. Make sure it’s lined up nicely with your wiring.
- Install your new faceplate. Line up the connectors and slide the faceplate to secure it. Note: It should click into place.
- Turn on your power. If you’ve made it this far, you have peace of mind that your thermostat works. But let’s make sure it connects…
- Connect your thermostat! Connect your thermostat to your Wi-Fi, then pair it to the mobile app on your phone. Once your app is up and running, you’re good to go!
Not good with wiring? Call an HVAC expert to install.
How much does it cost to install a smart thermostat?
A smart thermostat installation by an HVAC professional could cost anywhere between $200 to $1,200, depending on the model, if additional wiring is required, and labor hours (1, 2).
If you know your HVAC system is getting up in age, it may be time for an HVAC makeover. After all, if you have a clunky, inefficient unit and a fancy new learning thermostat, that’s pretty much the definition of “putting lipstick on a pig.”
Overall, yes, a programmable smart thermostat is a good energy-saving move for your home, but if you have an aging heating and cooling system, it may be time to consider home energy upgrades that can make your house feel better year round.
Get powerful home energy upgrades with a guarantee
If you qualify, you can get home comfort and efficiency upgrades—like a new super-efficient HVAC system paired with a smart thermostat or insulation and air sealing upgrades—at no upfront cost. (Love paying cash? You can do that too.)
If your house doesn’t save energy, Sealed will take the hit. Not you.
We do hassle-free, expert energy upgrades with flexible payment options and an energy-savings guarantee if you qualify.
We make it easy to feel better and lower your energy bills at the same time.