What’s the right fix for a drafty door? Discover short-and long-term solutions to help block drafts and make your home feel better year round.
If you’ve recently noticed a chilly, unpleasant breeze when you stand in front of a closed door in your house—well, first off, we’re sorry.
That’s definitely not what’s supposed to happen inside your home.
Secondly, you aren’t alone.
Many people (especially folks who own older houses) deal with drafty doors all winter long, thinking that the problem isn’t fixable.
Here’s the thing, though: Your drafty door is fixable—no matter how cold your climate or how old your house. (Really.)
Ready to take off your three sweaters? Read on… or use the links below to skip ahead.
- Blocking door drafts—Short-term solutions
- Do draft stoppers work?
- How to fix a drafty door permanently
- Learn how to stop drafts for good—at ZERO upfront cost
Ultimately, it’s important to fix drafty doors because, even if your family doesn’t mind wearing extra clothes in the house, cold drafts are a sure sign that you live in a house that isn’t keeping outside air outside.
That means a lot of the energy you purchase is getting wasted.
(Wondering why your heating bill is so high? Your drafty door is part of the problem.)
So! Below you’ll get some great short-term drafty door solutions (like how to make a door draft blocker) as well as long-term fixes to permanently rid your house of drafts.
A drafty door means a lot of the energy you purchase to heat and cool your home is being wasted.
Blocking door drafts—Short-term solutions
The key to troubleshooting and fixing a drafty door is to remember one key fact: If you feel a draft, cold air has to be getting in somewhere.
The trick is to find out exactly where cold air is entering, and then… stop it. (Why, yes! We are geniuses!)
Tap here to learn how to find air leaks.
Ultimately, here are the usual culprits behind door drafts:
- Gaps between the door and the wall or floor
- Torn, warped, or worn-out weather stripping
- Improperly-installed doors, or…
- Doors that don’t fit properly in their frames (if you can see daylight around the sides of your door when it’s closed, that’s a bad sign)
- Your door insulation has worn out
- Worn-out thresholds (or a gap between the bottom of the door and the threshold)
How to fix these problems in the short-term? You’ve got a few options:
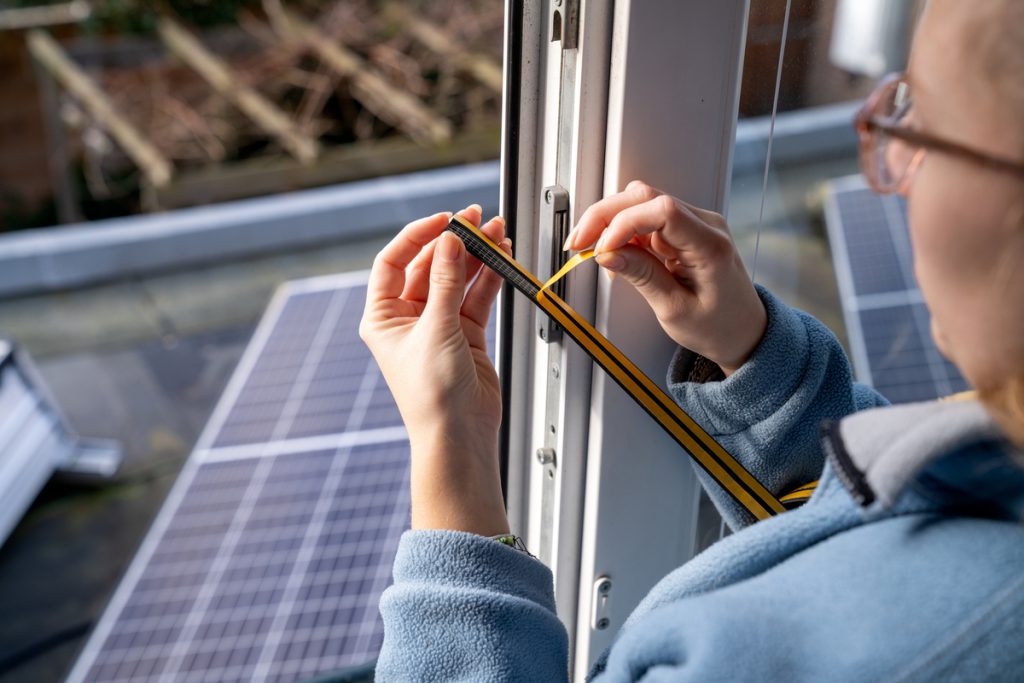
Install or replace the weatherstripping on your door
The first, and maybe most obvious, short-term solution is to purchase and install weatherstripping—which is material that’s used to seal the gap between the door and the frame.
Short-term weather stripping is usually made of foam or rubber, and if you want the fastest, most convenient option, look for adhesive-backed foam stripping. (You should be able to find it at any home supply store.)
How do you install weatherstripping?
That depends on which kind you choose—be sure to follow the instructions from the manufacturer—but the general process looks like this:
- Measure and cut the weatherstripping to size. If you got the foam stripping, it’ll be easy to cut.
- Remove any existing weatherstripping and thoroughly clean the surface underneath.
- Press the weatherstripping into place using even pressure. Depending on the kind you chose, you may need to secure it with nails, staples, or screws.
- Test for leaks by closing the door tightly and examining the edges for gaps in the seal.
Voila! Less cold air. (You may now remove one extra sweater.)
Updating the weatherstripping on your door is just a start.
If you’re ready to take your draft-stopping strategy to the next level, learn about whole-house weatherization.
Make (or purchase) a door snake
How do you insulate a door gap? Try a snake.
(A door snake, obviously. We don’t recommend letting snakes loose in your house.)
Yes, door snakes are a simple technology—and, yes, they may look a little goofy—but they can stop a significant amount of cold air from entering through the bottom of your door frame.
There are many kinds of draft excluders available—a quick Google search will yield more options than you have time to look at—but if you’re feeling crafty, you might consider constructing your own, tube-style draft stopper.
A draft stopper is basically a fabric tube filled with insulating material (like polyester fiber, recycled stuffed animals, or rice for a homemade version).
The tube is placed along the bottom of the door frame and is designed to block cold air from entering your house through gaps in a drafty door.
How do you make a door draft protector?
Making your own door draft blocker (also called a door snake or draft stopper), can be fairly easy—and it’s an opportunity to reduce, reuse and recycle!
First, you’ll need to gather supplies.
You’ll need:
- A length of fabric, at least 3 inches longer than the width of your door—it usually comes out to about 33-35 inches. Theoretically, you can use any kind of easily sewable or glue-able fabric, but we recommend something durable and cheap, like calico or cotton canvas, and in a dark color so you can go longer between cleanings.
- Polyester fiberfill, rice, or recycled plastic shopping bags to fill the snake
- Scissors
- A needle and sturdy thread, hot glue gun, or sewing machine (your preference!)
Next, assemble your draft stopper:
- Cut the fabric. Measure and cut out two pieces of fabric in the length and width you need for your door snake—remember to leave ¾ of an inch for the seam.
- Sew the pieces together. Place the two pieces of fabric on top of each other with right sides facing inward and sew them together along three sides using your needle and thread or a sewing machine. (If you prefer an alternative, use an iron-on hem or hot glue gun to create your seams.) Leave one end open—this is where you’ll stuff the snake later.
- Stuff the snake. Turn your fabric right side out and fill it evenly with stuffing material until you reach your desired shape and size. Don’t fill it to the gills! Leave some space at the end so you don’t have any trouble finishing up the project.
- Close it up! Once you’re done stuffing, stitch up the remaining open end using either hand-sewing or a sewing machine. (Or your hot glue gun if you skipped the thread.)
Now that you’re finished, place the door snake along the bottom of the offending door.
You may now downgrade your hiking-grade wool socks to everyday wool socks!
If your floor is uneven, install a door sweep
Finally, if your floor is uneven, or if there’s just an unusually large gap between the bottom of the door and the threshold, a door sweep can make a great short-term solution for drafts.
Door sweeps are thin strips of metal or plastic that attach to the bottom of the door and help seal out cold air by “sweeping” along the threshold when you close the door.
Here’s how to install a door sweep:
- Measure from end-to-end to make sure you purchase a sweep that fits your size doorway.
- Remove any existing screws or nails from the bottom edge of your door frame.
- Place the sweep into position so that it evenly fits across the width of your door.
- Secure with new screws or nails, depending on the sweep you purchased (some come with adhesive backing).
- Test for leaks by closing the door tightly and examining the edges for gaps in the seal.
Keep in mind here, that door snakes and sweeps only really work for the air coming through the bottom of your door frame.
So before you embark on any “DIY fix drafty door” projects, it’s worth it to ask… well, whether all this is worth it.
Do draft stoppers work?
A quick point of order here: Are door draft stoppers worth it?
Do draft stoppers (and other temporary solutions) ever succeed at blocking door drafts?
The answer? Kind of!
Outside air is a genius at getting in your house—it sneaks in through every nook and cranny, gap and seam.
The temporary solutions can certainly make things a bit more comfortable.
But they don’t completely address the reason your house is drafty; that’s due to those open gaps and seams taking in outside air around your house… and if you have insufficient insulation?
That can make a drafty house worse—insulation is supposed to act as the thermal boundary for your home. (But more on all that below.)
A quick definition here: A thermal boundary (or thermal barrier) is any material or object that helps block the flow of air between two spaces. Theoretically, your walls, roof, and insulation comprise the thermal barrier for your house—and should keep outside air out and inside air in.
But, in reality, most houses in the U.S. are under-insulated and full of air gaps—which creates drafty doors, windows, and uneven temperatures in rooms.
And this allows for energy loss, too. Air leaks alone can be responsible for up to 40% of the energy loss in your home. (1)
In short, short-term fixes like draft stoppers and door snakes can reduce your draft problem—you may be able to put away your fleece-lined sweats.
But for real results you’ll need to invest in some longer-term solutions (i.e., fix the real problem).
So how do you do that?
Well, there are three big steps to consider (and don’t panic, because you may be able to get this whole project done for NO upfront cost).
Air leaks alone can be responsible for up to 40% of the energy loss in your home.
How to fix a drafty door (permanently)
Buckle up! You’re about to learn how to fix The Real Problem.
First step?
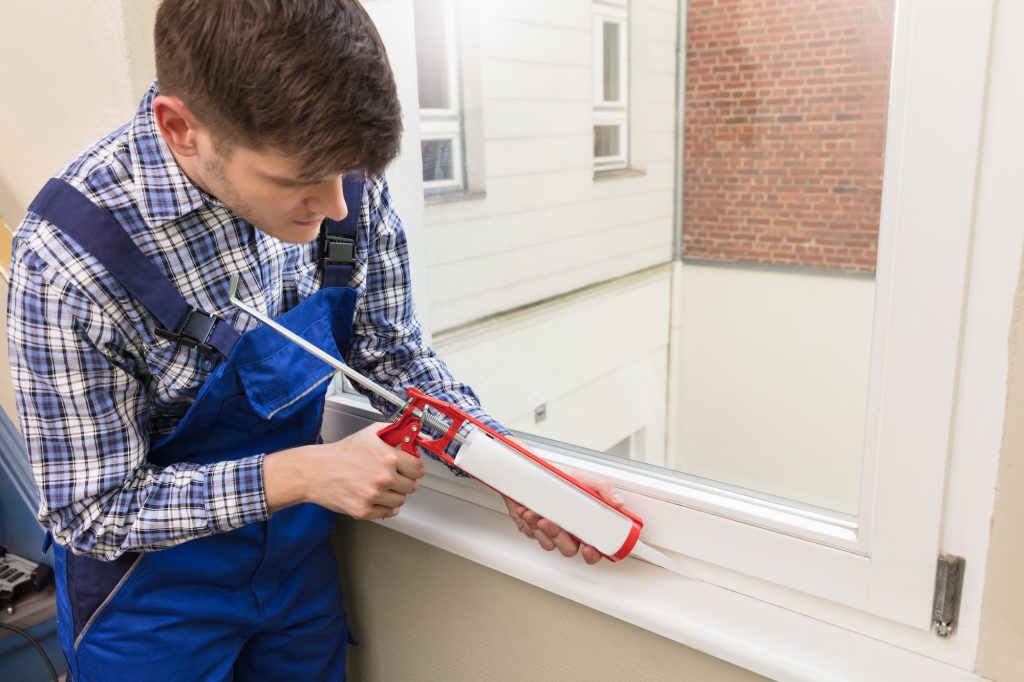
1. Seal the door (better yet, seal your whole house!)
The first step to permanently fixing your drafty door is air sealing. This means finding and sealing all the little gaps and cracks around your door—and then all around your house.
You can find complete details about air sealing here, but essentially, it just means using materials like caulk and expanding foam to seal up areas such as windows, recessed lighting, fireplaces, foundation walls, attic hatches—anywhere air might try to get in.
This might sound like a simple process, but air sealing should be done by professionals.
It requires special tools, materials, and a good “feel” for sealing (you don’t want to do it incorrectly, because that could result in some very unpleasant unintended consequences).
Tap here to learn why air sealing works for drafty houses (and solves the underlying reason for your drafty doors).
2. Make sure your attic is insulated
Okay, this one is counter-intuitive, so bear with us: Ensuring the top of your house is insulated can make a huge difference when it comes to resolving the draft problem in your house.
Why? Well, there’s a reason cool air is rushing in through the gaps around your door—it’s filling the vacuum left by the warm air that’s rising (and escaping) through the top of your home due to insufficient insulation.
So if you stop that warm air from escaping through the top of your home, you’ll stop the cycle that’s pulling in excessive cold air through and around your door.
(It’s pretty interesting science, and you can learn more about it in our guide to attic insulation—or read How does insulation save energy? to learn more.)
These two steps are the main ones, and they’ll likely solve a lot of your draft problems—if not all of them.
But if you live in a large, old house, there’s one more permanent fix that you may need.
3. Install a permanent door threshold (optional, but may be necessary in some cases)
Finally, if you’ve noticed that your floor is not quite level, you may need to consider installing a permanent door threshold. (Not sure if this is right for you? Find a home energy audit near you.)
This is definitely a job for a professional. When fitting a threshold, precision is key to ensure that the floor and the door meet evenly—accidentally misfitting a permanent threshold can cause further damage.
So go with your intuition: If this kind of job sounds like it’s outside of your wheelhouse… it’s probably outside of your wheelhouse. (No judgment. This writer wouldn’t attempt it either.)
Speaking of that, if all of these home upgrades sound like a lot of work you don’t want to do, we’ve got some great news. Sealed can do it for you.
And, if you qualify, you can get the job done for no money upfront.
Stop drafts for good—and for ZERO upfront cost
Okay. Here’s how Sealed works (in about 10 seconds!).
If your house qualifies for a Sealed energy makeover, you’ll get a free expert energy assessment of your home—and we’ll create a customized plan for your energy upgrades.
(You’ll get everything you need and nothing you don’t! Want a new energy-efficient heat pump? You got it. If you don’t need new HVAC, skip it for now.)
After you approve the plan, we’ll hire and vet the best local contractors and manage the project from start to finish.
Then after we make your house more comfortable, more energy-efficient, and the envy of your neighbors, you’ll pay for the work done with a flexible payment plan that works best for you.
(Learn how the payment plan works.)
Sound intriguing? Want to see if you qualify? Complete our easy, 2-minute questionnaire here.